Event Alarm Triggers
Event Alarm triggers are the limits and conditions the users can set on a point to generate alarms and notifications about the data being set on these points.
Alarm Triggers are accessed via the Digital Twin Explorer (DTE). Add points to the Point Selection Tool and click on the Alarm Config button
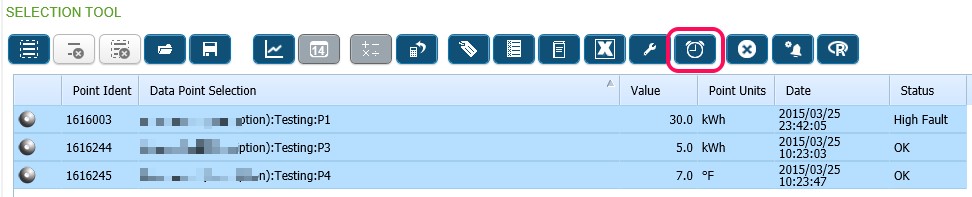
This opens up the general Alarm Configuration area where, for users whose group has been granted permission, there is the button titles Alarm Trigger Definition. Click on this to enter the Event Alarm Triggers area.

This list will display any existing alarm triggers defined on the selection of points that were added to the point selection tool on the DTE.
List Columns:
- Enabled – Shows whether an alarm trigger is active/enabled. Existing Event Alarm Triggers can be enabled/disabled on this list by ticking the box (if the user has can edit)
- Purpose – Displays the purpose text of the trigger
- Reason – Displays the reason text for the alarm trigger
- Point – Displays the point name that the trigger is on.
- Breach – Shows the breach level for the alarm trigger
- Creator – Displays the login name of the user that created the alarm
- Hierarchy (Priority) – Displays the hierarchy/priority of the alarm trigger
- Auto Sleep – If an alarm trigger is set to sleep for a period of time after first triggering this column displays the number of minutes it will de-activate itself after triggering an alarm
- Contacts – The names of contacts who are subscribed to this alarm trigger
- Can Edit – If the user can edit this alarm. If un-ticked the alarm is read only for the current user. Rules for who can edit alarms are explained in the alarm detail section
Using the Event Alarms List Page
- List Filtering – To search or filter in grid for particular text in a column type in the input box in the column header. The details in the list will filter on details in this box as they are entered.
- Fullpath checkbox – Putting a check in the Fullpath checkbox will display the point fullpath along with the point name. Un-checking this box will show the point name only in the list.
- Edit Selected – Highlight a row in the list and click the Edit Selected button. The alarm trigger will be opened in an Alarm Detail screen. If the user does not have the can edit of the trigger it will be opened in read-only mode, otherwise it will be opened editable. Alternative way to perform edit selected is to double click on a row in the list.
- Creating a New Trigger – Click the New button. A dialog to select the point is shown as below.
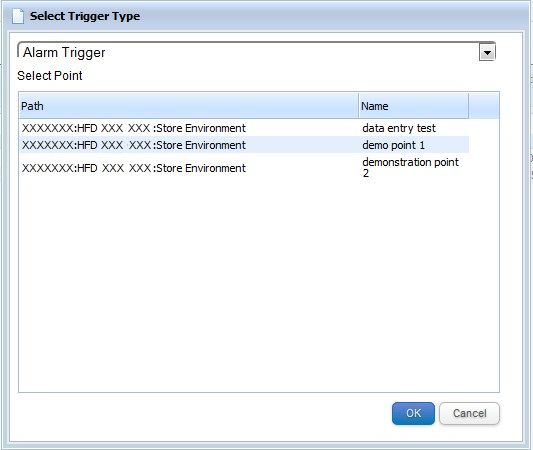
Leave the selection as Alarm Trigger (only option currently available, future versions will have other choices here), select a point and press ok to open the Alarm Trigger detail page.